Gluten Free Salted Caramel Slice
Sweet, salty and made for rainy afternoons
The rains finally came.
Beginning with a storm that blew in from the ocean with intent — clouds peaked and grey, lightning streaking in forks and streams. Pressure building. A few tentative drops at first, paving the way for the rest.
Summer is usually our wet season, yet this year the grass has held a brittle crunch underfoot and the flowers have dulled under the relentless sun.
And then, relief. A cool reprieve.
With the sky now hidden behind clouds, there’s a subtle shift in the air. A whisper of seasonal change. I can already see the next few weeks unfolding — cups of tea in steady rotation, knitted blankets pulled close, curled into the lounge as the rain taps against the windows.
Comfort.
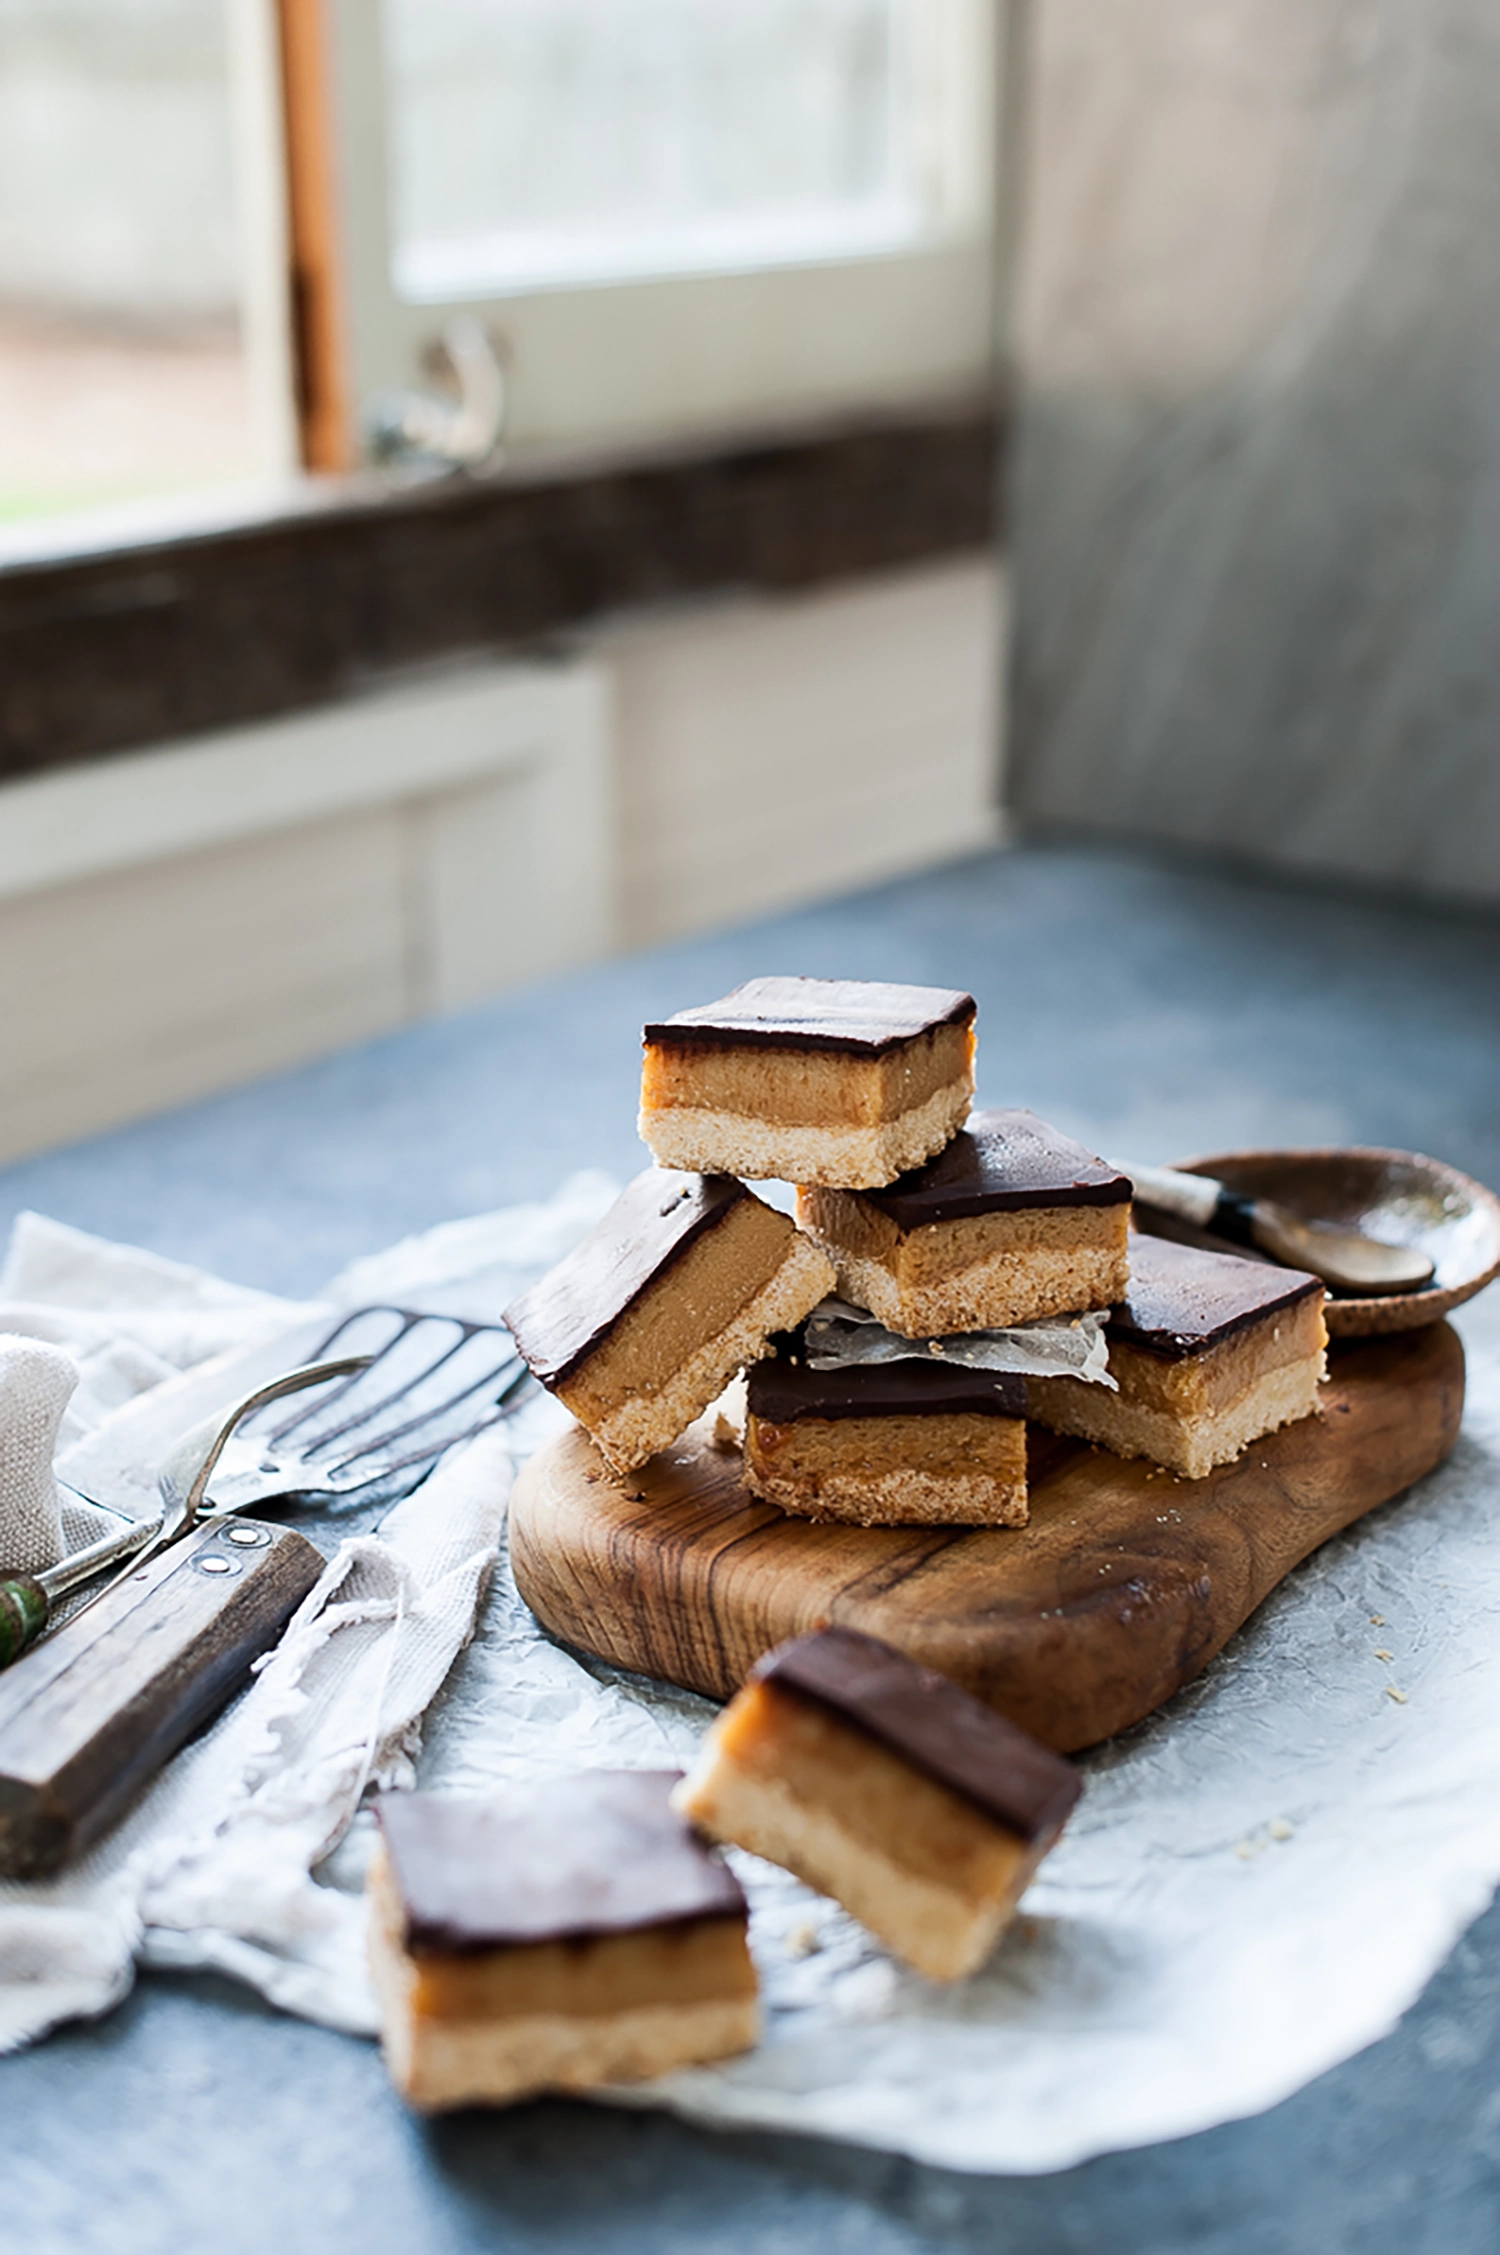
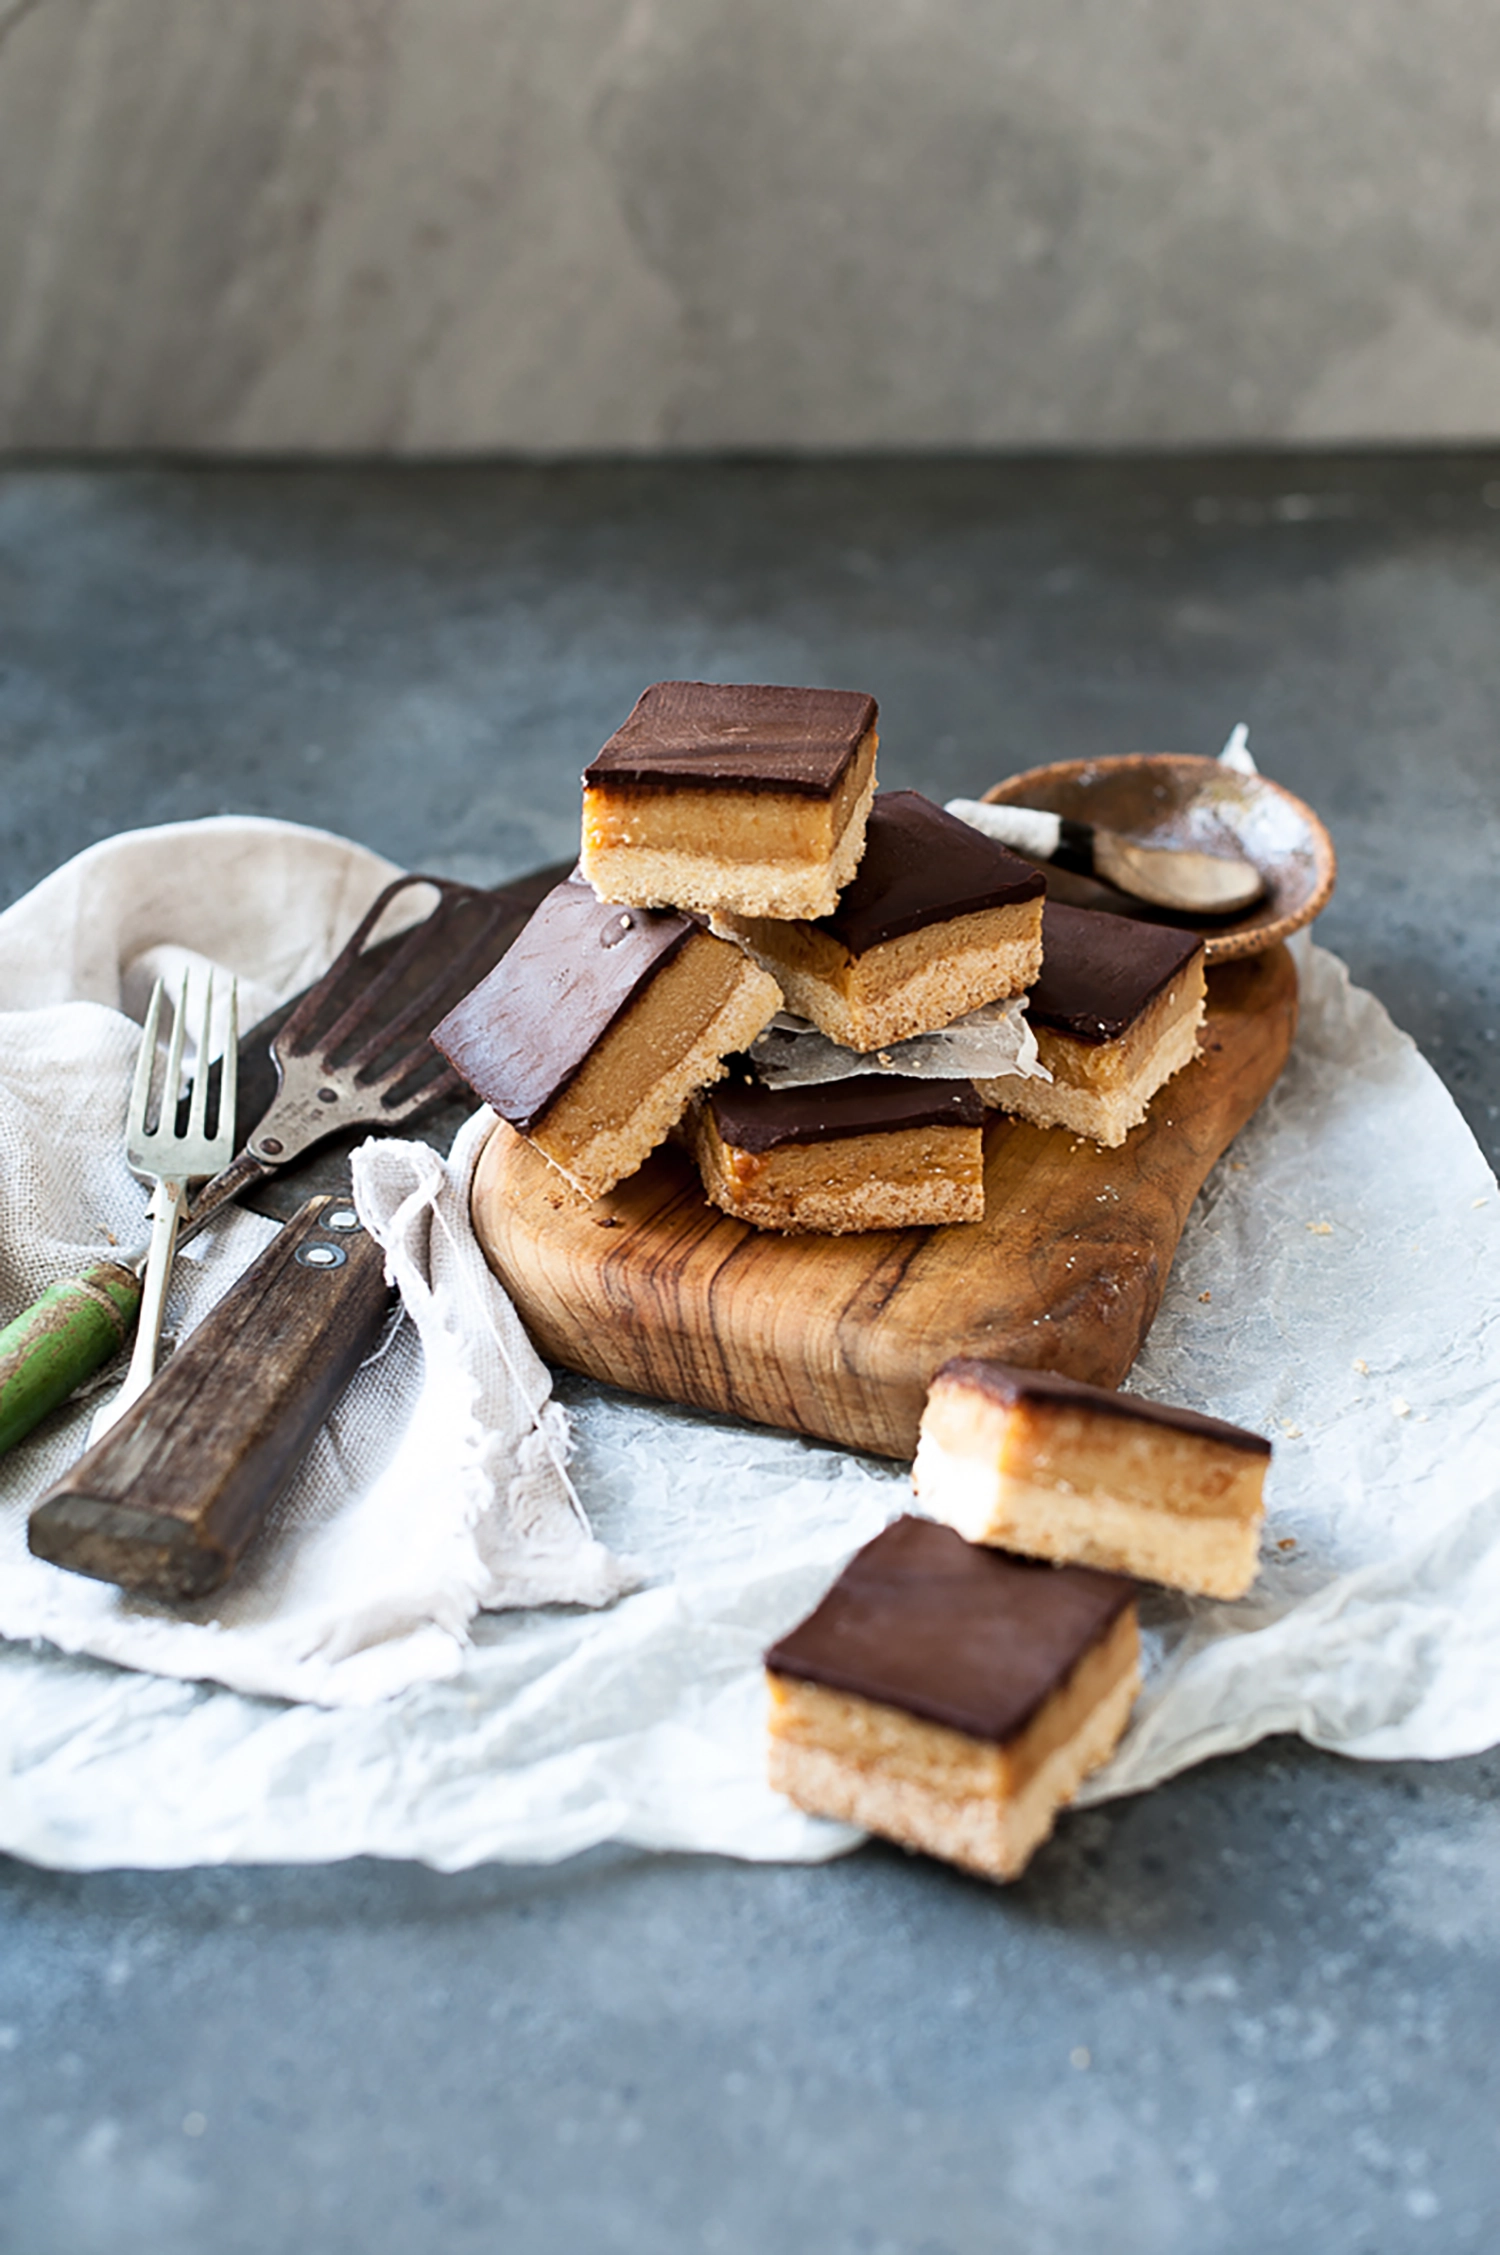
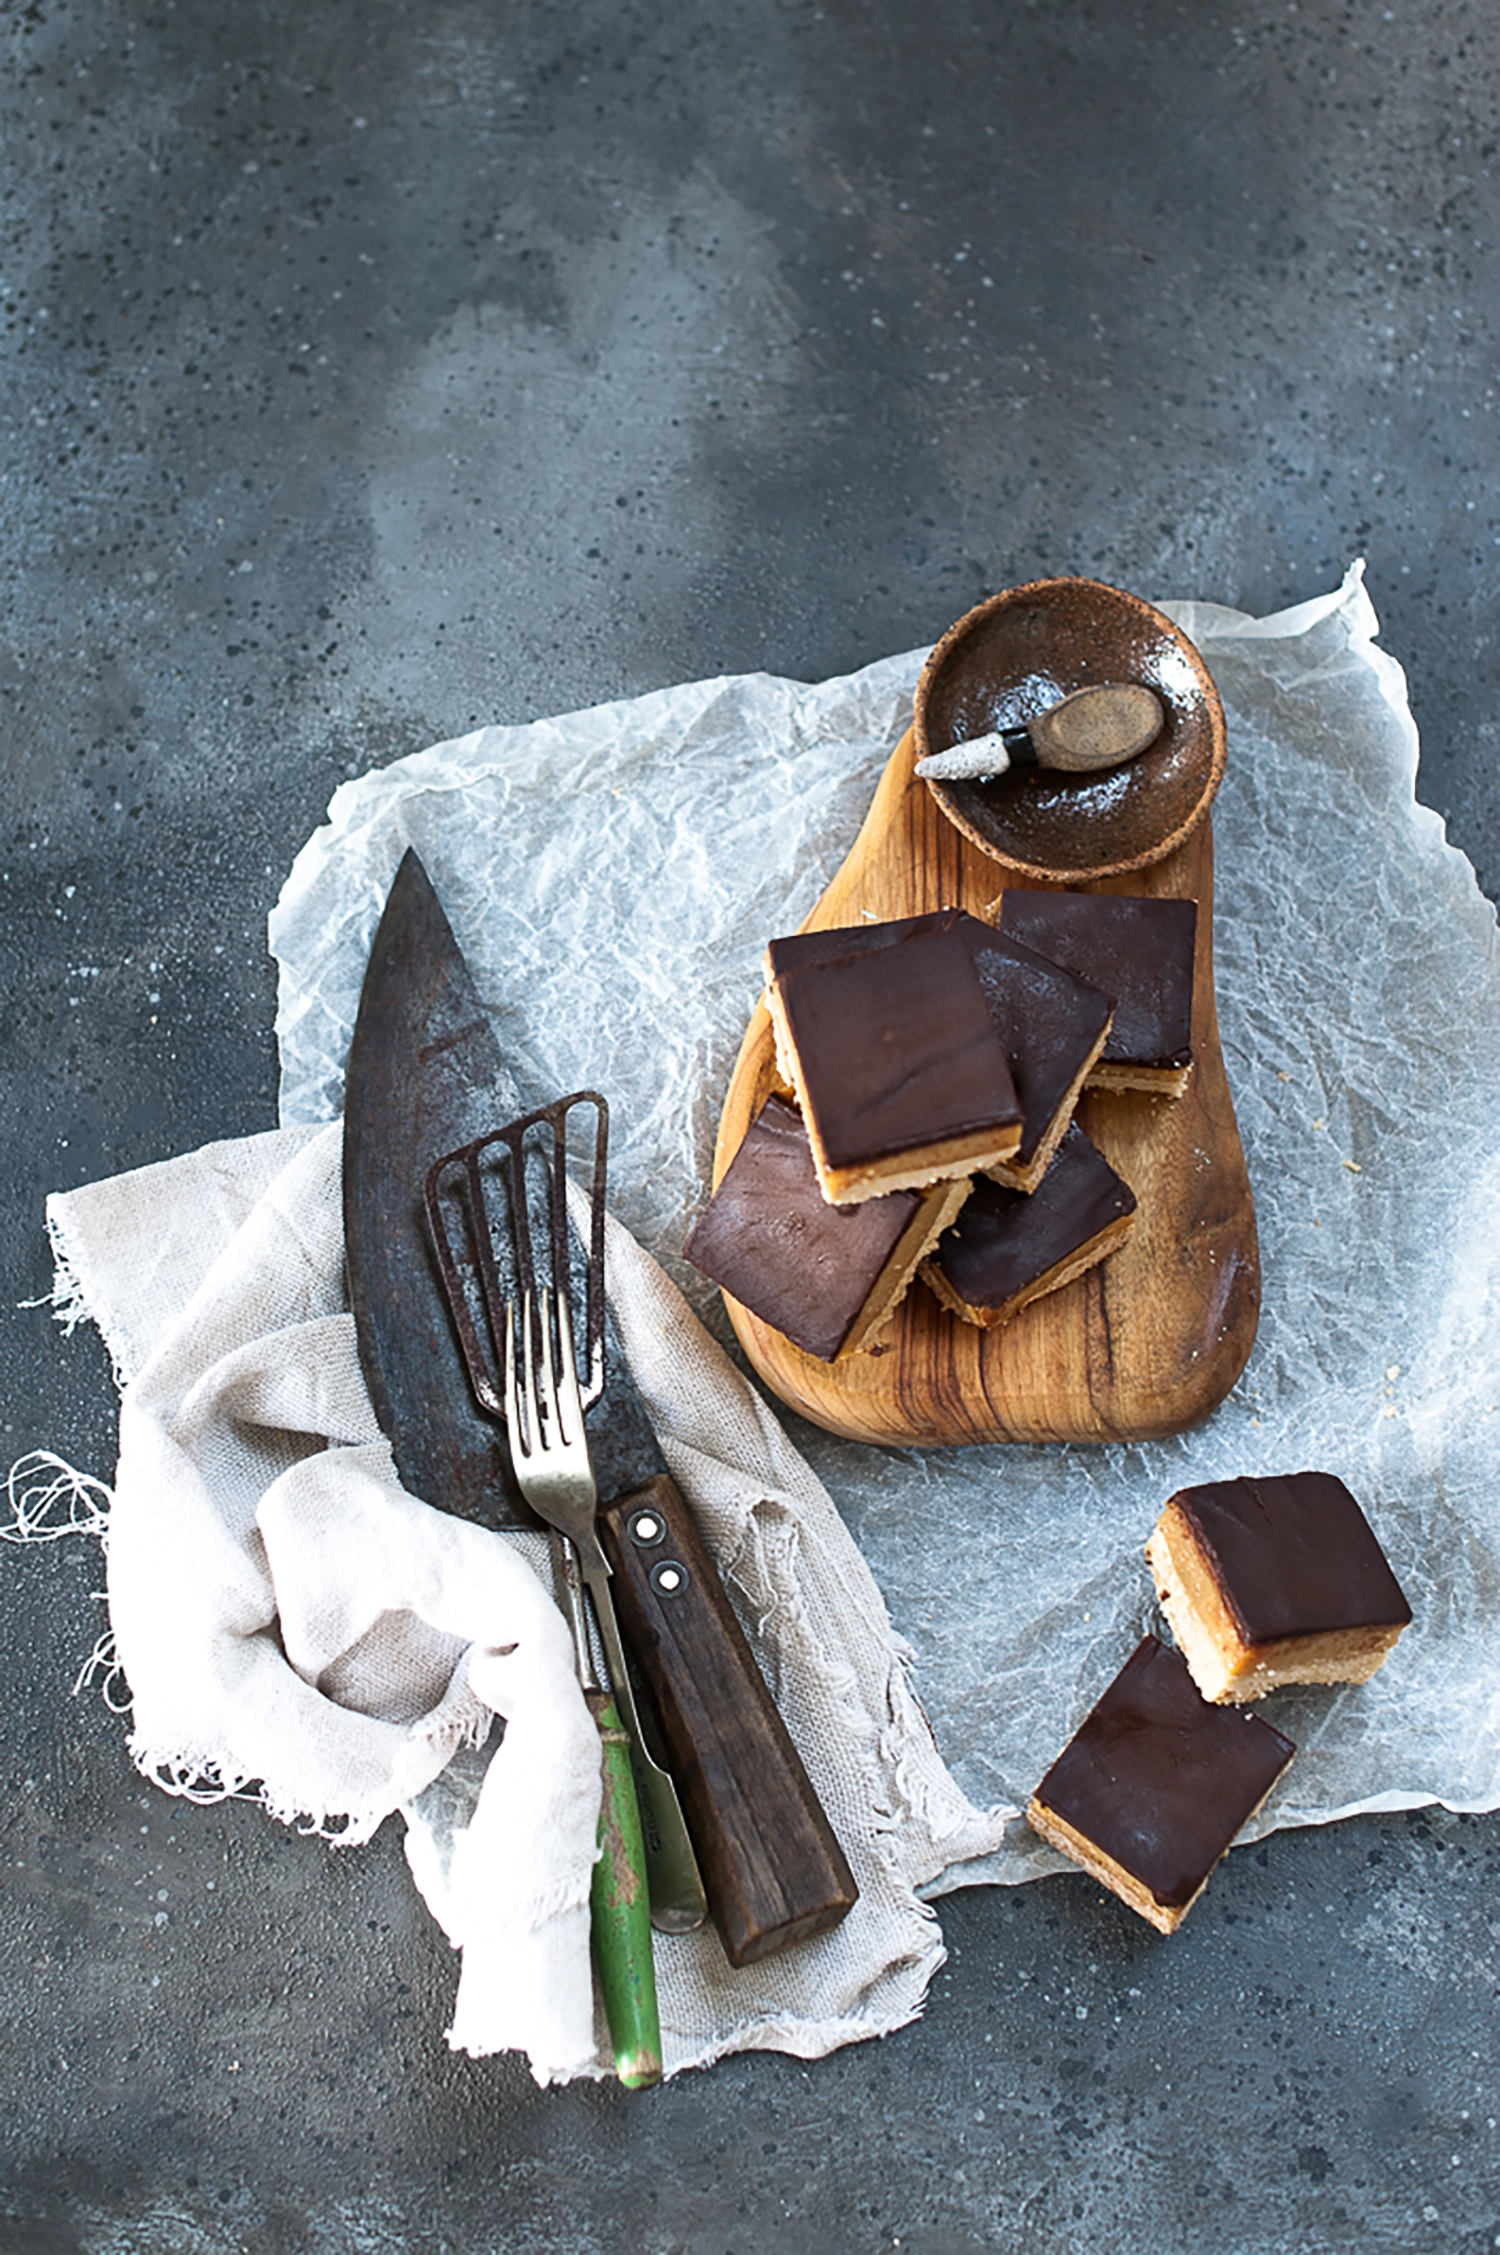
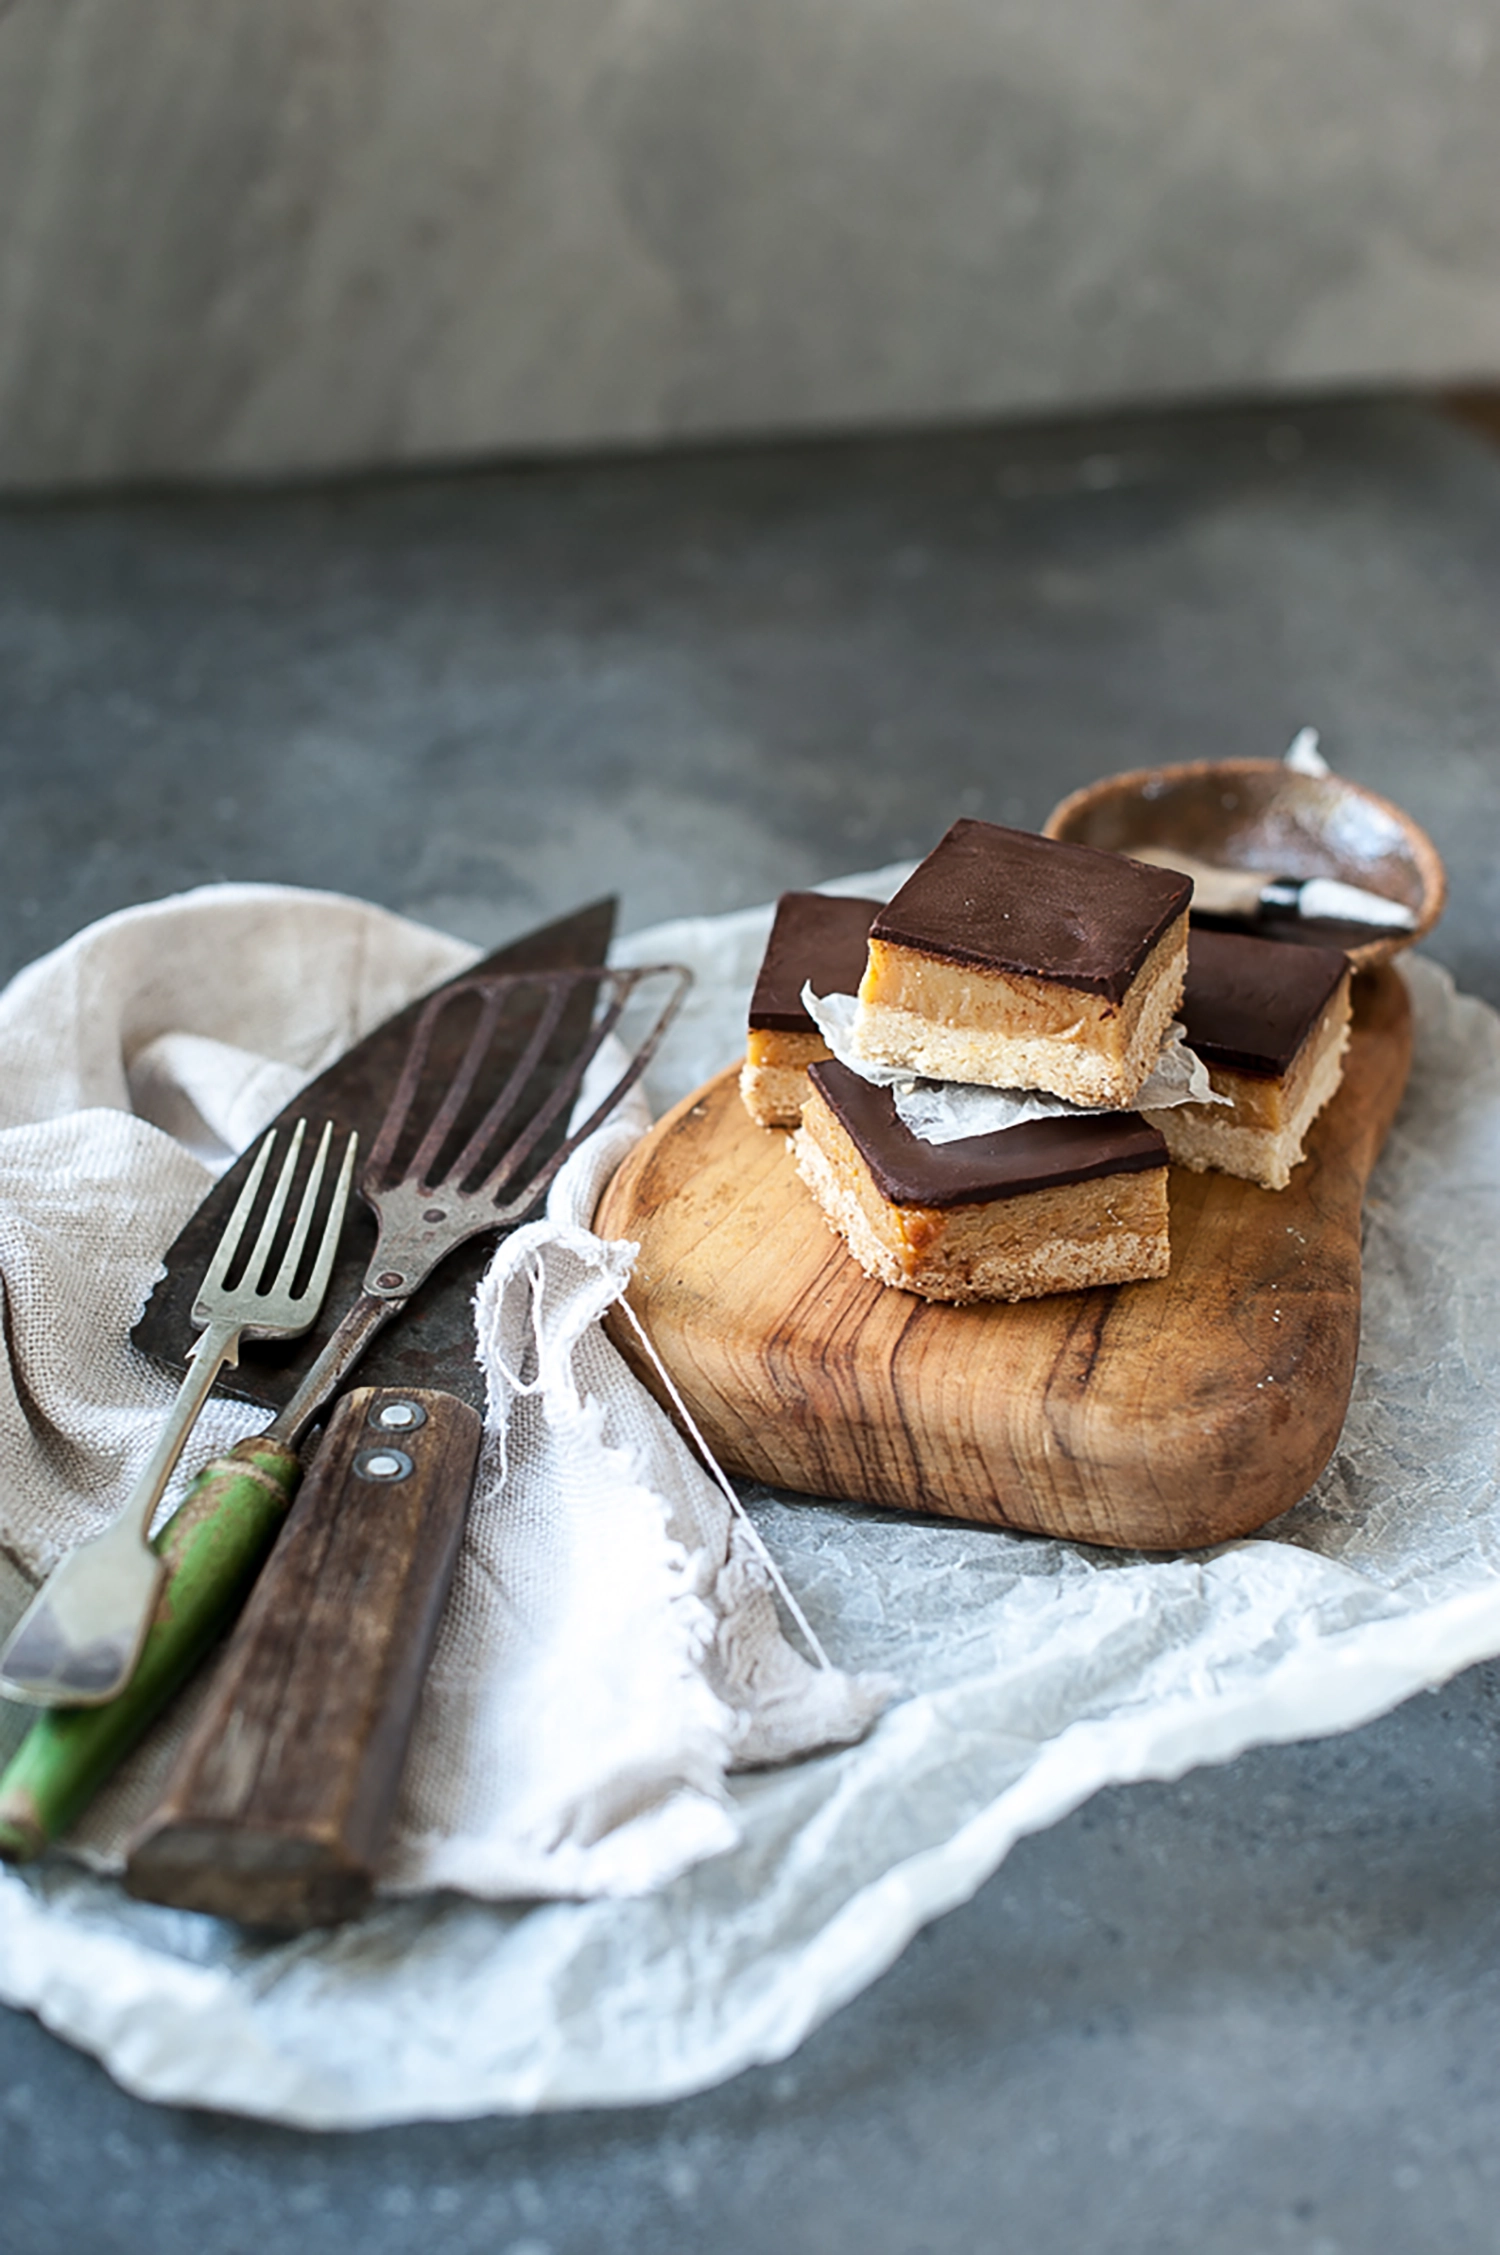
And alongside that comfort? This Gluten Free Salted Caramel Slice.
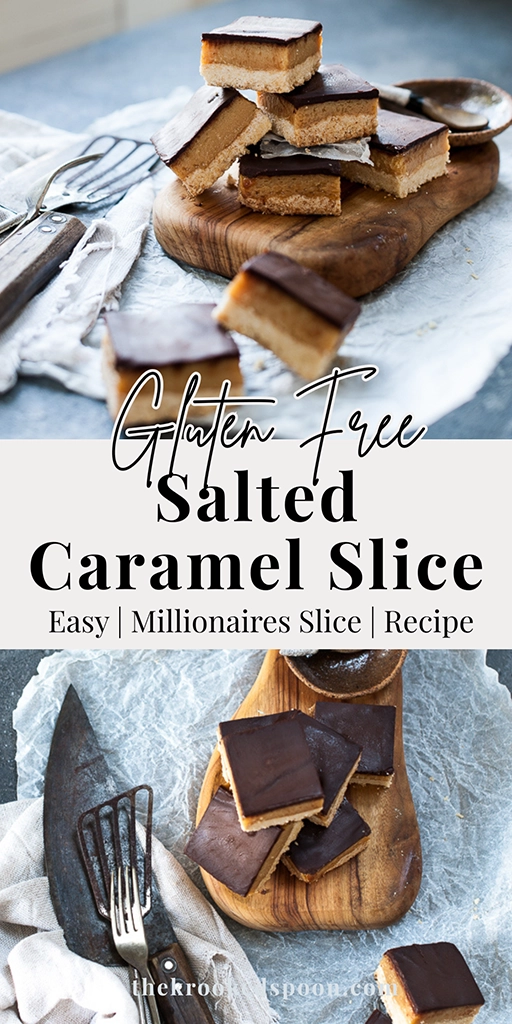
I’ve made it more times than I can count. Sweet and salty in perfect balance. A buttery base, thick golden caramel and a glossy layer of dark chocolate. It’s loved by everyone who tries it — the sweet tooth satisfied, especially when paired with a hot cup of tea.
Why You’ll Love This Salted Caramel Slice
-
Perfect sweet and salty balance
-
Buttery gluten free base
-
Thick, luscious caramel layer
-
Simple pantry ingredients
-
Easy to make ahead
-
Keeps beautifully for days
It’s nostalgic, indulgent and deeply satisfying.
There’s something grounding about making caramel slice. Pressing the base firmly into the tin. Stirring the condensed milk slowly as it thickens into golden silk. Smoothing chocolate over the top in one glossy sweep.
It requires patience — especially the chilling — but the reward is worth every moment.
And truly, few things pair better with a stormy afternoon than salted caramel and tea.
Recipe: Gluten Free Salted Caramel Slice
Prep Time: 10 minutes
Cook Time: 15 minutes
Chill Time: 4 hours (minimum)
Difficulty: Easy
Serves: 20+ squares
Ingredients
Caramel Layer
-
2 cans sweetened condensed milk
-
25 g butter
-
Big pinch sea salt
Chocolate Topping
-
½ block dark chocolate
-
1 tbsp olive oil
Base
-
½ cup caster sugar
-
1 cup desiccated coconut
-
2 ¼ cups gluten free plain flour
-
175 g butter, melted and slightly cooled
Method
1. Prepare the Base
-
Preheat oven to 180°C (160°C fan forced).
-
Line a 20 x 30 cm slice tin with baking paper.
-
In a food processor combine caster sugar, coconut and gluten free flour. Pulse to combine.
-
Add melted butter and process until the mixture resembles breadcrumbs.
-
Press firmly and evenly into the lined tin.
-
Bake for 10–15 minutes or until lightly golden.
-
Remove and cool slightly.
2. Make the Caramel
In a heatproof bowl, combine condensed milk, butter and sea salt.
You can thicken using either method below:
Microwave Method
-
Microwave at 50% power for 1 minute.
-
Stir and repeat until thickened and just beginning to bubble (around 5 minutes total).
Bain Marie Method
-
Place bowl over a saucepan with 3 cm simmering water (ensure bowl doesn’t touch water).
-
Stir continuously until caramel thickens and leaves a trail when stirred.
Once thickened, pour over the cooled base and smooth gently.
Bake for 10 minutes or until edges just begin to brown.
Cool to room temperature, then refrigerate for at least 4 hours or overnight.
3. Add the Chocolate Topping
-
Melt chocolate gently (microwave at 50% power or bain marie).
-
Stir in olive oil until smooth.
-
Pour over chilled caramel and spread quickly and evenly.
-
Allow to set fully before slicing.
To cut cleanly, use a hot knife (run under hot water and wipe dry between cuts).
Store in an airtight container for up to 1 week.
Tips & Variations
-
Add extra flaky sea salt on top before chocolate sets
-
Use milk chocolate for a sweeter finish
-
Add a thin layer of peanut butter between caramel and chocolate
-
Swap olive oil for coconut oil in the topping
-
Toast the coconut in the base for added depth
Serving & Storage
-
Best served at room temperature for softer caramel
-
Store refrigerated in warm climates
-
Keeps up to 7 days in an airtight container
-
Can be frozen (slice first) for up to 2 months
FAQ
Q. Why cook the condensed milk first?
Pre-thickening ensures a rich, stable caramel layer.
Q. Can I use regular flour?
Yes, substitute equal amount if gluten isn’t a concern.
Q. Why add oil to the chocolate?
It creates a softer, sliceable top that won’t crack when cut.
Q. How do I stop the chocolate cracking?
Slice when chocolate is just set but not rock hard, or score lightly before fully firm.
The rain has a way of slowing everything down.
It invites stillness. Reflection. Baking.
This gluten free salted caramel slice has become part of that ritual — made as clouds gather, sliced as the kettle boils, shared as stories unfold.
Sweet. Salty. Comforting.
Exactly what the season calls for.
Gluten Free Salted Caramel Slice
Ingredients
- 2 Cans Sweetened Condensed Milk
- 1/2 Block Dark Chocolate
- 1 Tbsp Olive Oil
- 1 Big Pinch Sea Salt
- 25 gm Butter
Base
- 1/2 Cup Caster Sugar
- 1 Cup Desiccated Coconut
- 2 1/4 Cups Gluten Free Flour
- 175 gm Butter melted and slightly cooled
Instructions
Base
- Line a 20x30cm (9’x11′) brownie pan with silicone paper and preheat oven to 180C (160C fan forced)
- In a food processor combine caster sugar, coconut, Gluten Free Flour and pulse to combine
- Add the melted butter and whiz until combined and resembles bread crumbs
- Press the base mix into the lined tin until even and compacted
- Place in the middle of the preheated oven and bake for 10-15mins or until slightly browned
- Remove from oven and allow to cool slightly
Caramel
- In a heat proof bowl add the cans of condensed milk, butter and salt and follow either the microwave or bain marie method of thickening the mix (to follow)
- Once Caramel is thickened pour over the base and tap gently to smooth
- Place into the oven for 10 mins or until the mix just starts to brown around the edges
- Remove form the oven and allow to cool to room temperature then chill in the oven for at least 4 hours or over night
- Melt the chocolate gently either in a bain marie or in the microwave set on 50% power, add the oil and stir to combine
- Pour over the chilled caramel and working quickly smooth out evenly.
- Allow to set and the cut up using a hot knife (run under hot water) cleaning after each cut.
- Store in an air tight container up to 1 week.
Microwave Method
- Place the heat proof bowl with the caramel mix in the microwave.
- Microwave for 1 minute at 50% power. Remove and stir. Repeat until the caramel just starts to bubble and thickens around 5 mins.
Bain Marie Method
- Place a sauce pan with 3 cm of water in it on the stove and bring to a slow simmer.
- Place the heat proof bowl with caramel mix on top of the sauce pan making sure the water doesn’t touch the bottom of bowl.
- Stir the caramel mix until it thickens and when stirred leaves a trail through the mix.
Notes
If You loved this Recipe try one of these
Sweet Potato Brownie (Gluten Free, Dairy Free, Nut Free)
Little Roasted Beetroot and Dark Chocolate Cakes
Pear and Almond Frangipane Freeform Tart – Gluten free
Chocolate Lamingtons (gluten and dairy free)
Salted Vanilla Bean Caramel
Pin for Later
Did You Make This Recipe?
I’d love to see your version of these Gluten Free Caramel Slice!
Tag @thekrookedspoon on Instagram and use #thekrookedspoon so I can share your creation.